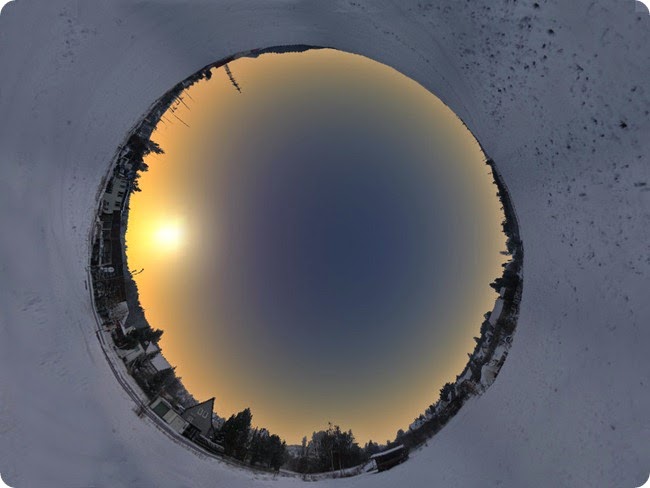
After my first successful try today, I thought I'd write a little tutorial for creating landscapes. Here are some (hopefully) simple steps:
1. Take your images. All I did was take my compact camera and my tripod out to my desired location, and take a set of horizon shots (all the way round) and then import them to Autostitch to make a simple panorama (see below). I filled the ground in by copying and pasting, as you can see (the original panorama was not straight, so it left some black areas underneath).
The Panorama must be a PNG, and I recommend sizing it down to about 2048 pixels in width. The following panorama has already been processed for Stellarium (see step 3) which is why the sky is missing. Once you have your panorama, move on to step 2.
2. Extend the canvas. This involves increasing the height of the image above and below the horizon, as shown in the illustration below. This is important because otherwise the horizon will be too 'thin' and it means that you have to zoom out too much for the scenery to be properly sized.

You can see it as putting more floor between you and the horizon scenery, meaning that it appears further away from you. The actual horizon on Stellarium runs through the centre of the image, so you need to keep your image horizon in the middle of the picture when you are adding the extensions:
3. Delete the sky from the image. Stellarium looks for 'blank' locations in the image when it decides where the scenery ends and the sky begins, so you need to erase the actual sky from the photo. I used paint.net to select the sky in my panorama, and then pressed 'delete' to get rid of it, exposing the checkered canvas behind. You cannot just paint over it in MS Paint, you actually need to remove it from the canvas. To add extra effect, you can delete the pixels in subtle areas (between tree branches, through windows, etc...) to produce a realistic horizon.
4. Create your landscape folder. You need to add a new folder to the Program Files --- Stellarium --- landscapes directory (its name does not matter). Then, create a next file called 'landscape.ini' (you can copy and paste this from another landscape folder and erase its contents) and copy your panorama to the same folder.
5. Write your landscape file. This can be done by copying and editing the following text into your 'landscape.ini' file:
[landscape]
name = Enter your landscape name here
author = Enter your name here
description = Enter a description here
type = spherical
maptex = yourimagename.png
angle_rotatez = Enter angle
[location]
planet = Enter planet
latitude = +XXdXX'XX"
longitude = -XXdXX'XX"W
altitude = X
name: This is the name of your landscape as it will appear in the program.
author: Your name
description: A brief description of the landscape.
type: The style of image. Leave as spherical.
maptex: The filename of your panorama (in the same folder as the .ini file).
angle_rotatez: Experiment with this to get your compass points in the right location. It is a three figure bearing (i.e. - 010, 254, etc...)
planet: The name of the planet your landscape is on.
latitude/longitude: The location of your landscape on your planet. Does not need to be accurate - it is for reference purposes only. It will not affect what you see in the sky.
altitude: The altitude (M) of your spot. Once again, purely for reference.
Once you have made your panorama, adjusted the canvas size, created your folder, writted the landscape.ini file and put it with your panorama in your folder, you are ready to go.
1. Take your images. All I did was take my compact camera and my tripod out to my desired location, and take a set of horizon shots (all the way round) and then import them to Autostitch to make a simple panorama (see below). I filled the ground in by copying and pasting, as you can see (the original panorama was not straight, so it left some black areas underneath).
The Panorama must be a PNG, and I recommend sizing it down to about 2048 pixels in width. The following panorama has already been processed for Stellarium (see step 3) which is why the sky is missing. Once you have your panorama, move on to step 2.
2. Extend the canvas. This involves increasing the height of the image above and below the horizon, as shown in the illustration below. This is important because otherwise the horizon will be too 'thin' and it means that you have to zoom out too much for the scenery to be properly sized.

You can see it as putting more floor between you and the horizon scenery, meaning that it appears further away from you. The actual horizon on Stellarium runs through the centre of the image, so you need to keep your image horizon in the middle of the picture when you are adding the extensions:
3. Delete the sky from the image. Stellarium looks for 'blank' locations in the image when it decides where the scenery ends and the sky begins, so you need to erase the actual sky from the photo. I used paint.net to select the sky in my panorama, and then pressed 'delete' to get rid of it, exposing the checkered canvas behind. You cannot just paint over it in MS Paint, you actually need to remove it from the canvas. To add extra effect, you can delete the pixels in subtle areas (between tree branches, through windows, etc...) to produce a realistic horizon.
4. Create your landscape folder. You need to add a new folder to the Program Files --- Stellarium --- landscapes directory (its name does not matter). Then, create a next file called 'landscape.ini' (you can copy and paste this from another landscape folder and erase its contents) and copy your panorama to the same folder.
5. Write your landscape file. This can be done by copying and editing the following text into your 'landscape.ini' file:
[landscape]
name = Enter your landscape name here
author = Enter your name here
description = Enter a description here
type = spherical
maptex = yourimagename.png
angle_rotatez = Enter angle
[location]
planet = Enter planet
latitude = +XXdXX'XX"
longitude = -XXdXX'XX"W
altitude = X
name: This is the name of your landscape as it will appear in the program.
author: Your name
description: A brief description of the landscape.
type: The style of image. Leave as spherical.
maptex: The filename of your panorama (in the same folder as the .ini file).
angle_rotatez: Experiment with this to get your compass points in the right location. It is a three figure bearing (i.e. - 010, 254, etc...)
planet: The name of the planet your landscape is on.
latitude/longitude: The location of your landscape on your planet. Does not need to be accurate - it is for reference purposes only. It will not affect what you see in the sky.
altitude: The altitude (M) of your spot. Once again, purely for reference.
Once you have made your panorama, adjusted the canvas size, created your folder, writted the landscape.ini file and put it with your panorama in your folder, you are ready to go.
If you liked this article, subscribe to the feed by clicking the image below to keep informed about new contents of the blog:


0 commenti:
Post a Comment